Using Token2 TOTP hardware tokens with WatchGuard AuthPoint

About AuthPoint
AuthPoint is WatchGuard's multi-factor authentication (MFA) service. With AuthPoint, you can require users to authenticate with the AuthPoint mobile app or a third-party hardware token when they log in to a protected resource, such as a computer, VPN, or a cloud service or application.
in addition to Watchguard's own devices, AuthPoint also supports any OATH TOTP compliant third-party hardware tokens. In this article we will explain how to request the seeds for your hardware tokens in WatchGuard-compatible format.
Requesting seeds
After your order was physically delivered you can request the seeds for the tokens in multiple formats, including WatchGuard-compatible PSKC file (RFC 6030) encrypted with a key file.
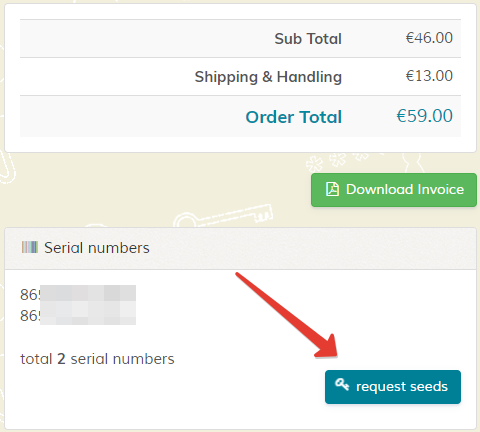
This will redirect you to a pre-filled seed request form. Only the following information is expected to be clarified by the end-users:
- Encryption method: you can use PGP by providing your public PGP or GPG key (recommended option), or, if you are not familiar with PGP, a password-protected zip file (you are expected to enter a strong password - containing english letters and digits). Important: do not use both methods.

- Choose the format you want the seeds to be sent under "Secret Key Format" section. For AuthPoint, choose "Encrypted PSKC XML format (WatchGuard AuthPoint)"
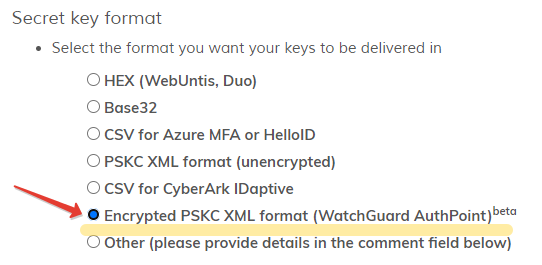
After completing the form, click on Send button to submit your request. This will send the request along with creating a support ticket assigned to one of our technical support agents. Shortly after, you will receive an update (both via email and via our support portal) with the seeds in the requested format as attachments or as downloadable links.
Importing the seed file to AuthPoint
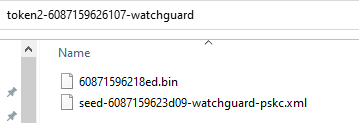
The seeds will be sent as a zip file that needs to be unzipped to a folder on your computer (if you specified one of the encryption methods, it has to be decrypted before extracting). The folder will contain two files, an .xml file and a .bin file used for decrypting the seeds.
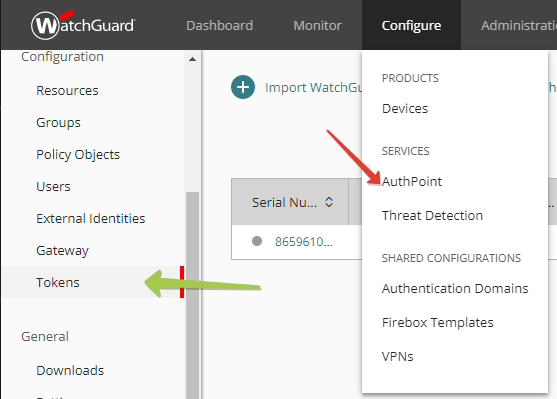
Log in to your Watchguard dashboard and navigate to Configure -> AuthPoint, then click on Tokens
Then, click on "Import Third-Party Tokens" to open the file upload dialog.
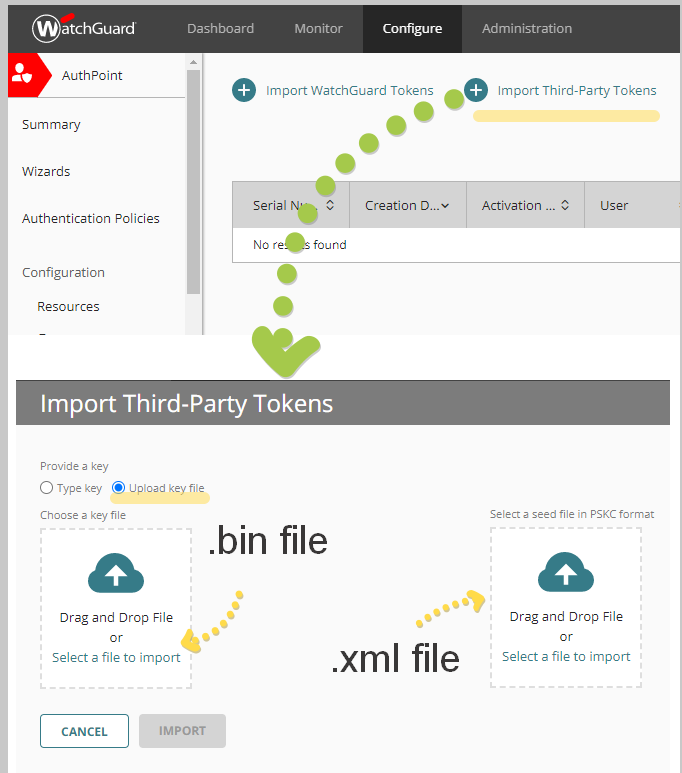
On the upload dialog, in "Provide a key" section, choose the "upload key file" option and point to the .bin file in the folder extracted in the previous step. In "Select a seed file in PSKC format" part, point to the xml file in the same folder. Click on Import button to complete the process.
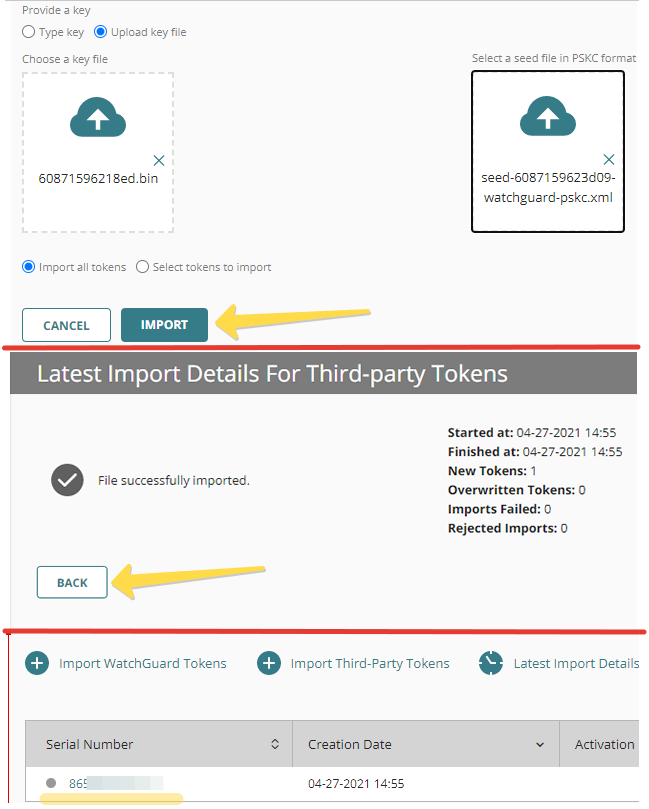
After the upload is completed, click on "Back" button to see the list of successfully imported hardware tokens.
Assigning and activating tokens
The last step of the process is assigning a token to a user and activating it. Click on the menu icon on the right of the token's row and select "Assign".

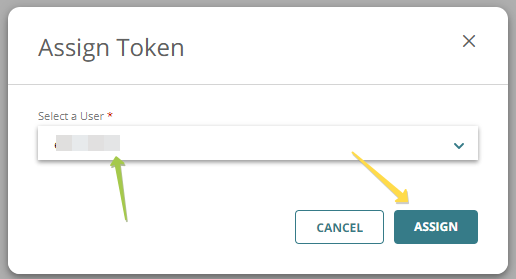
Select the user from the list (or search by name) and click on "Assign" button.
And, the as the final action, we need to activate the token for the user it was assigned to. To activate the token, you will physical need access to the token. To activate the token, open the menu on the right of the token's row and select Activate.
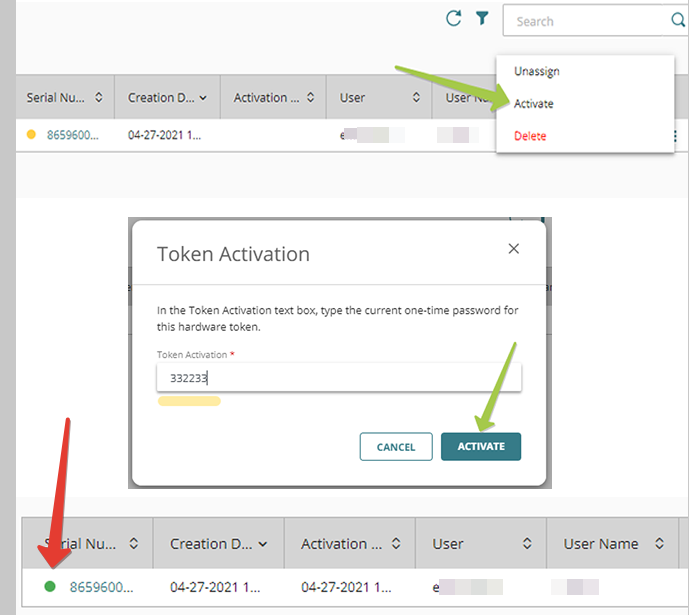
Then, enter the 6 digits code shown on the physical token's display and click "Activate". The successfully activated tokens should show a green dot in front of the serial number - this means the enrollment is now complete.
Subscribe to our mailing list
Want to keep up-to-date with the latest Token2 news, projects and events? Join our mailing list!
